Calculating the Amount of Foam You NeedHow to MeasureIn order to decide how much Handi Foam you will require for your DIY Spray Foam project, you will need to measure the space you intend to insulate. Do not feel intimidated, as it is a simple procedure. All you need is a tape measure and a calculator. So now you have found the tape measure at the bottom of the broom cupboard and begged or borrowed a tape measure, what next, you ask? Case Study 1You plan to insulate the walls of a barn conversion. Step 1: Measure the Width of Wall A Step 2: Measure the Height of Wall A Step 3: Decide how thick you want the insulation to be. For the purposes of the case study, we have decided to insulate to 2 inches (5cm).
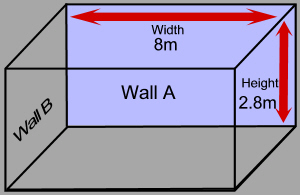 Step 4: Do the following calculation: Width 8m x Height 2.8m x Insulation depth 0.05m = 1.12 cubic metres Wall A therefore needs 1.12 cubic metres of foam. Step 5: Repeat the same process with wall B. The height of wall B is quite likely to be the same height as wall A. For the purposes of this case Study, Wall Bs measurements are as follows: Width = 5 metres, Height = 2.8 metres. (5m x 2.8 x 0.05m = 0.7 cubic metres) The wall opposite to Wall A is quite likely to be the same size as Wall A. The same theory would apply to wall B. Step 6: Wall A + opposite wall: 1.12 cubic metres x 2 = 2.24 cubic metres Wall B + opposite wall: 0.7 cubic metres x 2 = 1.4 cubic metres Step 7: 2.24 cubic metres + 1.4 cubic metres = 3.64 cubic metres Now that you have discovered the amount of expanded foam needed, you will need to select the spray foam kit combination that would be best for this project. Handi-Foam Kit Sizes
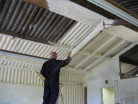
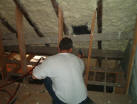
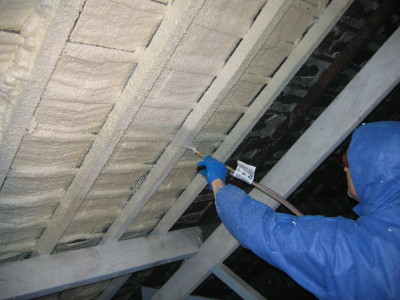
3.64 cubic metres of foam is a larger amount of foam than any single foam kit. This is why you are able to purchase extra tanks, which can be coupled onto either the medium or the large sized kit. In this case scenario, the most effective solution would be to purchase 1 Large kit + 2 sets of the Large Extra Tanks. Case Study 2You have decided that you want to insulate the roof of your attic, to prevent excess heat loss in winter and heat gain in summer. This is relatively simple to work out and you would proceed in much the same way as for Case study 1. 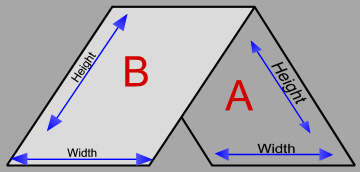 Measure side A and side B in the same manner as you measured Wall A and Wall B. The measurement of side A might be different to B depending on the manner in which your roof has been designed. Once you have measured A and B, work out the cubic metres of each and add them together. You should now have a final figure for the cubic metres required for the roof, proceed to the insulation table to select the appropriate Kit size and possibly replacement tanks (depending on the size of you DIY project), for your purposes. Case Study 3 - Measuring Corrugated Roofs for InsulationCorrugated roofs present their own problems, as the corrugations add 20-50% to the apparent area (depending on the type of corrugated sheet). The best way to determine how much extra area the corrugations add, is to use a piece of string or twine, and follow the contour of a corrugated sheet. Then measure the length of the piece of string and compare it to the straight line measurement. This should give you an indication of how much the corrugations increase the surface area of your corrugated roof, wall or barn 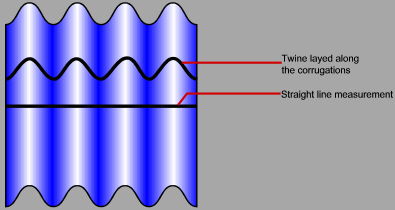 |
|